
Before we got our first Sony mirrorless camera we tried to do extensive research and compare various other cameras. We had plenty of Nikons and it was time to try something different. From the many reviews, we went through one negative comment was constant – the Sony menu system.
The thing about menu systems is that once you set it up you usually do not need to deal with it a lot. And even when you need to you always have a “Favorites” or “My Menu” where you store those hard to get to items. So we thought this is not a big deal.
Well, we got our A7III and we realized that some of the complaints in regards to the menu system are valid. Something as simple as switch between the EVF (Electronic View Finder) and the LCD is quite difficult to do. In fact, you can not unless you assign a custom button! Why would you need to do such a thing you would ask … good question let me explain:
The Problem
Out of the box, the camera switches automatically between the LCD and the EVF. When you get your eye on the EVF it defects it and shuts down the LCD. When your eye is away from the EVF it shuts it down and turns on the LCD. The issue is that the damn thing is so sensitive that every time you move your finger close to the EVF it shuts down the LCD which is THE thing you are a thing to change or do something with. Very annoying and frustrating after spending time with the camera. So we were on a mission to do this manually. If EVF is needed press a button to turn it on. Otherwise, keep LCD as the primary option. Or the other way around.
Since there are so many custom options you can have there are only a few that are not set and made sense to set this function on. We decided to set the Dial DOWN press to switch between the EVF and the LCD. Here is how we did it:
Step 1: Custom Operation1 > Page 8/9 > Custom Key
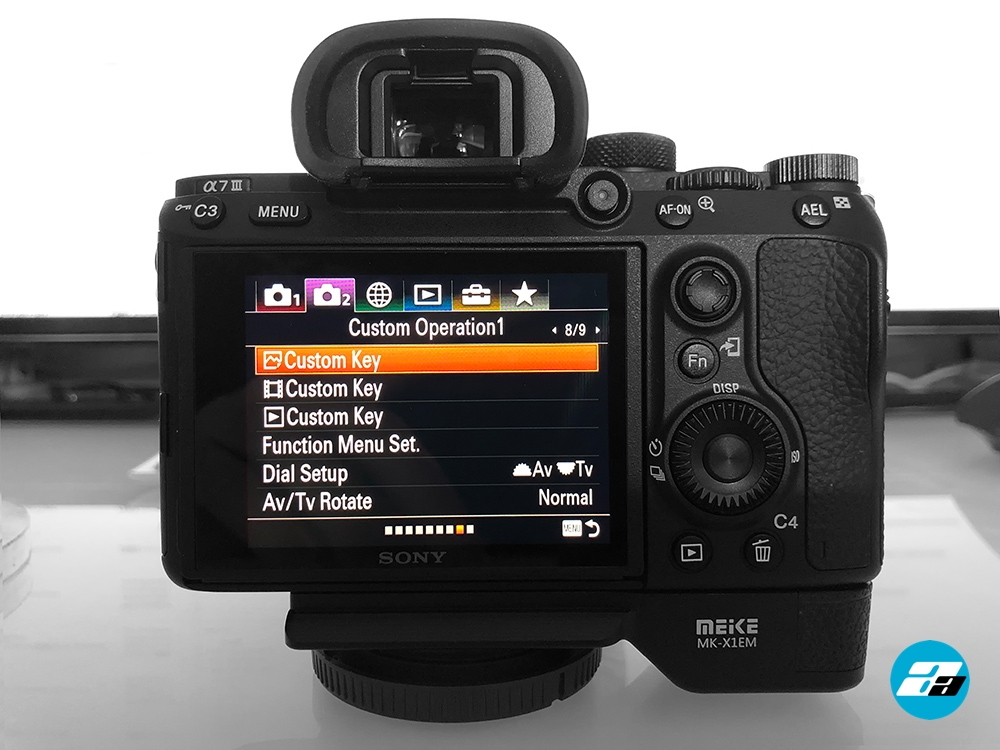
Please note that this selected item (Custom Keys) is a sub-menu for setting the camera custom keys (C1, C2, C3, C4, etc) ONLY when in “taking pictures mode”. The menu item underneath it is for setting the custom keys for when in video mode and the last one is for when in preview mode. It is not very self-explanatory. Icons are helping but not that much. Nikon menu system had a help function where you can press a button and see a screen full of explanation about the selected menu. It was VERY helpful. So back to the task at hand. Let’s get into the Photo Custom Key menu and try to find where the dial DOWN button is and set it to do what we want.
Step 2: Custom Key > Page 2 > Down Button
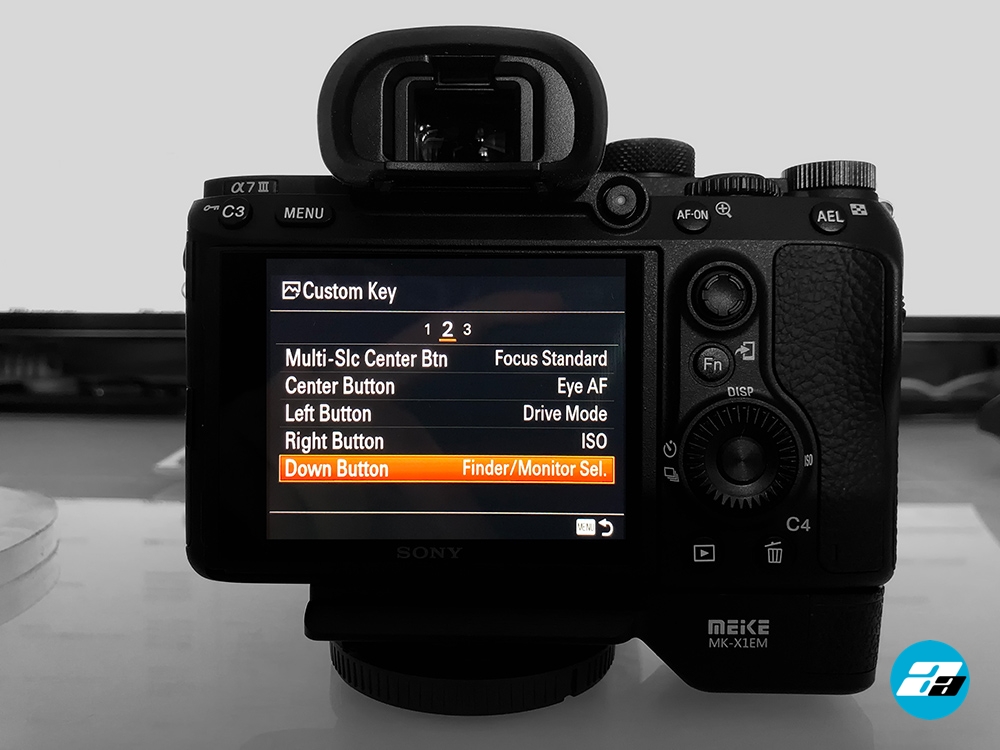
Once we are in the photo custom key section we go to page 2 and all the way down select/press on the “Down Button“. That refers to the main dial down button apparently. Next click on it and from that menu find the Finder/Monitor Sel. function located at page 14/19 in Display / Auto Review sub-menu:
Step 3: Display/Auto Review > Page 14/19 > Finder/Monitor Sel.
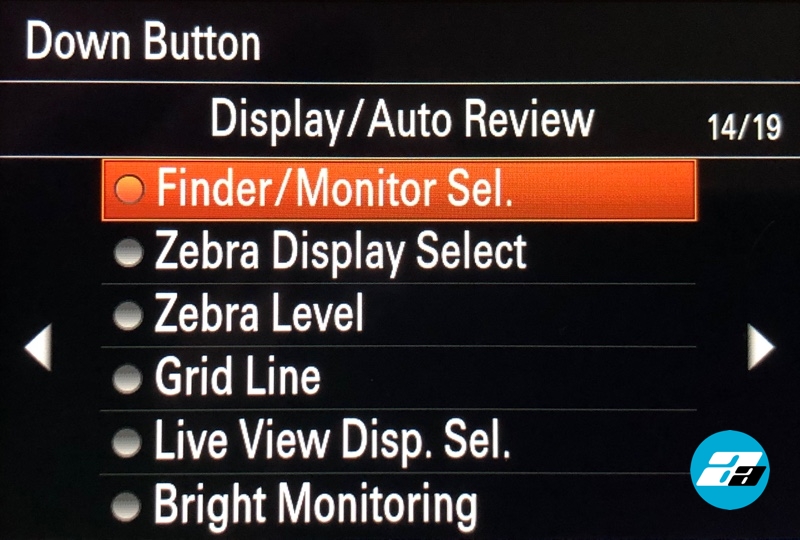
Once you select/press on the Finder/Monitor Sel. from the above Display / Auto Review sub-menu you are set. Now if you press the Down Button you will be able to manually switch between the LCD and the EVF!
Step 4: FINDER/MONITOR > Monitor (Manual)
Ok so we got the button covered but the camera still auto switches between the EVF and the LCD. In order to change that you need to go to the main menu (Just press the Menu button) and go to Display / Auto Review1 and then select FINDER/MONITOR (Yes it is in capital letters on the menu!). Once you select that you will get this on the screen:
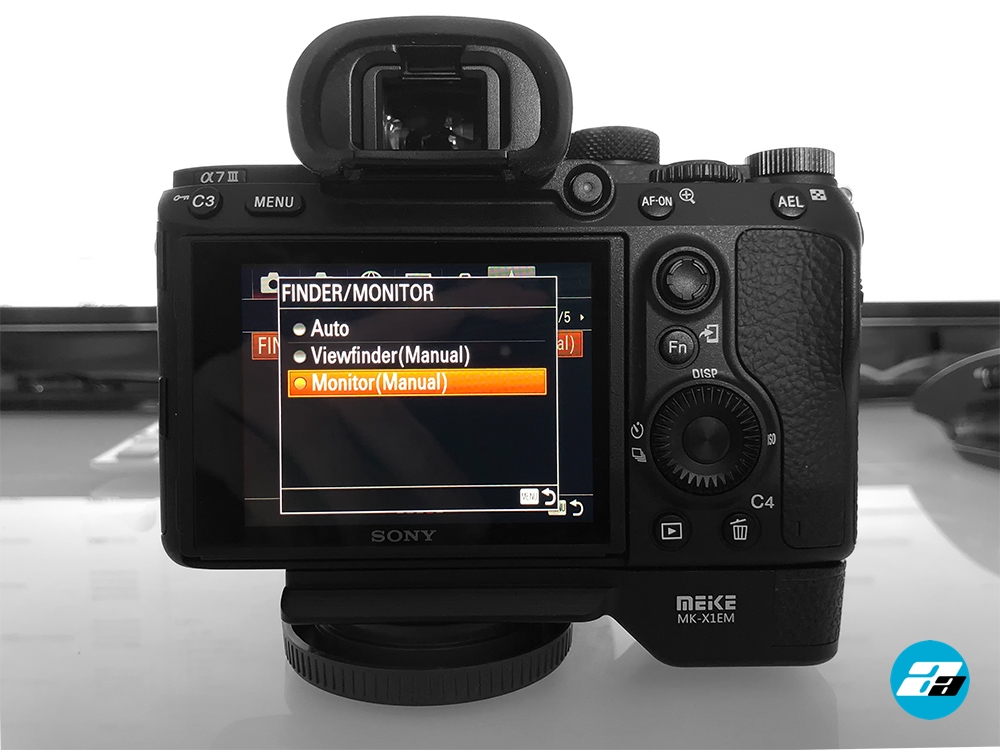
We want to select here Monitor (Manual) from this menu. Once you do that on start the camera will turn on the LCD and not the EVF EVEN if you have your eye on it. You have to press the Down button to switch between the LCD and the EVF. Pressing again on the Down button would get you back on the LCD and turn the EVF off.
Note: Auto Preview
One thing to note is that if you have Auto preview on and you have set it to one of the time intervals (like 3-5 sec) it would ONLY show on the currently selected viewpoint. So if you are shooting with EVF and you have the auto preview it would show ONLY in the EVF :). For that reason, I have disabled the auto preview and it is only available by pressing the preview button. It actually works great that way since once you know the shot is good you hardly need to check and have the camera show every other picture of that sequence on the LCD or the EVF.


Add comment